マリオガシャット詳細 その1(英訳付き) Details of the Mario Gashat −Part 1
あけましておめでとうございます。今年も宜しくお願い致します。
さて、年末年始に、マリオガシャットの記事に以下のコメントをいただきました。
Hi there, I’m am planning on making my own original gashat as well. Can I get a better pictures of the inside and outside of your gashat and label the parts inside the gashat. Thank you.
… 英語ですね。こんな感じの意味でしょうか。
こんにちは、自分も同じように、オリジナルのガシャットをつくってみたいと思っています。だから、内側も外側も、もうちょっと良い写真を見せてくれませんか?特に内側のパーツはラベル付けしてほしいです。
… うーん、マリオガシャットについては、記事内や昨年末のまとめ記事でも触れたとおり、結構ギリギリのバランスで成立しているもので、その動作も不安定です。そのため、その内部を詳細に語るということは、自分の技術の未熟さをさらけ出すことに他なりません。が、せっかく国を越えて質問してくださっているので、できる限りは応えたいと思います。
というわけで、ブログ開設以来初の英訳付き記事です。英語のクオリティについては保証しません。
1. 外側 / Outside
塗装 / Paint

このガシャットは元々は「シャカリキスポーツガシャット」です。ガシャットを分解してからサーフェイサーをふっかけて、その上から、自分が作りたいソフトの色に併せて塗装します。
This gashat was originally “Shakariki Sports Gashat.” After you break down the gashat into its parts, you should spray surfacer on them, and paint them with the color based on the game software you want to settle on.
これがサーフェイサーをふっかけて組み立てた状態ですね。この状態からもう一度分解して、自分の場合は、『スーパーマリオブラザーズ』のソフトの色に併せてキャメルイエローのカラースプレーをふっかけました。
This is the picture of my gashat after spraying surfacer on its parts and assembling them. From this point, you should break down it again, and in my case, I sprayed camel yellow color on them. The camel yellow color is based on the NES software “Super Mario Bros.”
自分の場合は制作開始したときにシャカリキスポーツしか売っていなかったのでわざわざ塗装しましたが、ガシャットのバリエーションが増えてきた今、自分が作りたいものに近い色のガシャットが売っているなら、それを使うのが塗装がなくてラクだと思います。
In my case, “Shakariki Sports Gashat” was the only gashat which had already been sold when I started to create my gashat. So I took the trouble to paint it, but now there are many gashats. If you can get a gashat which has the color you want to use, you should use it. It saves your trouble for painting.
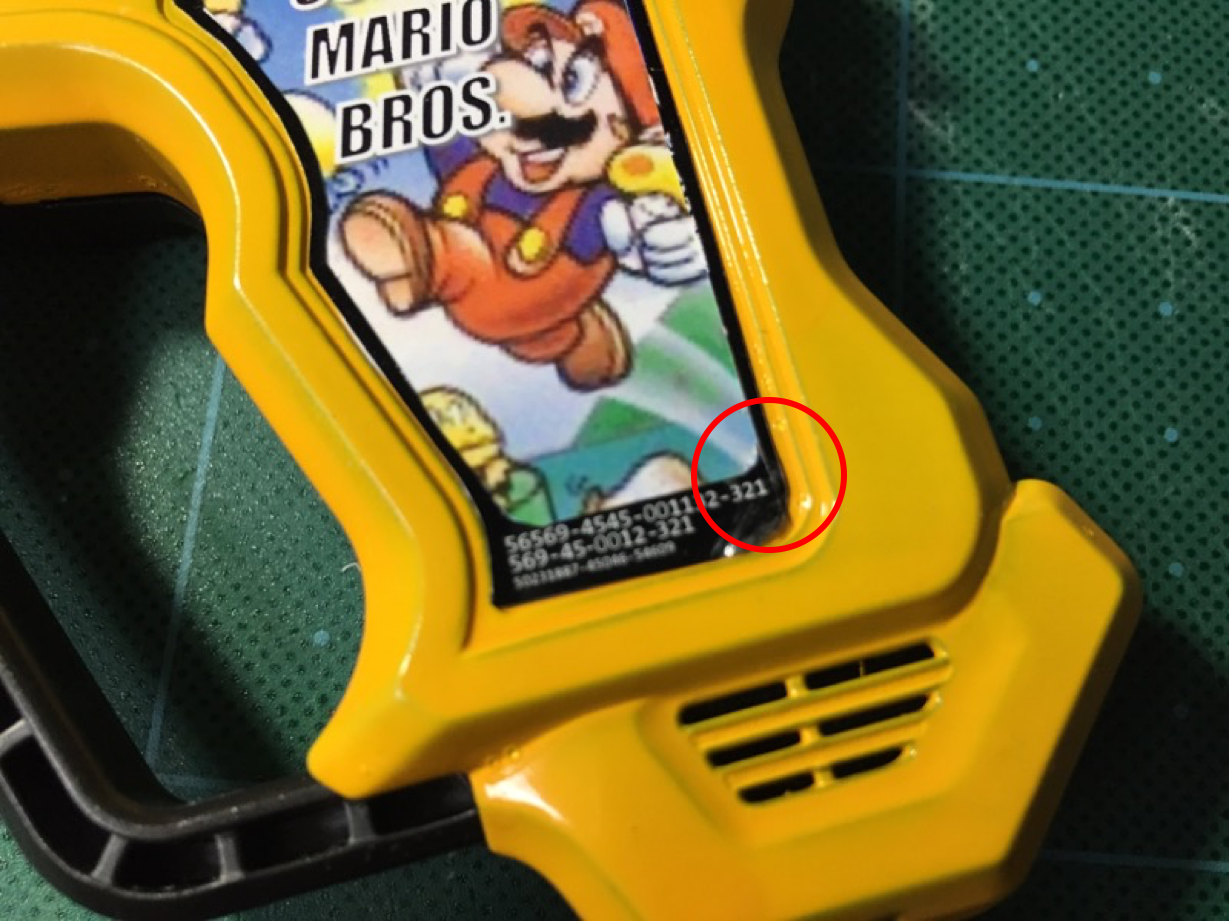
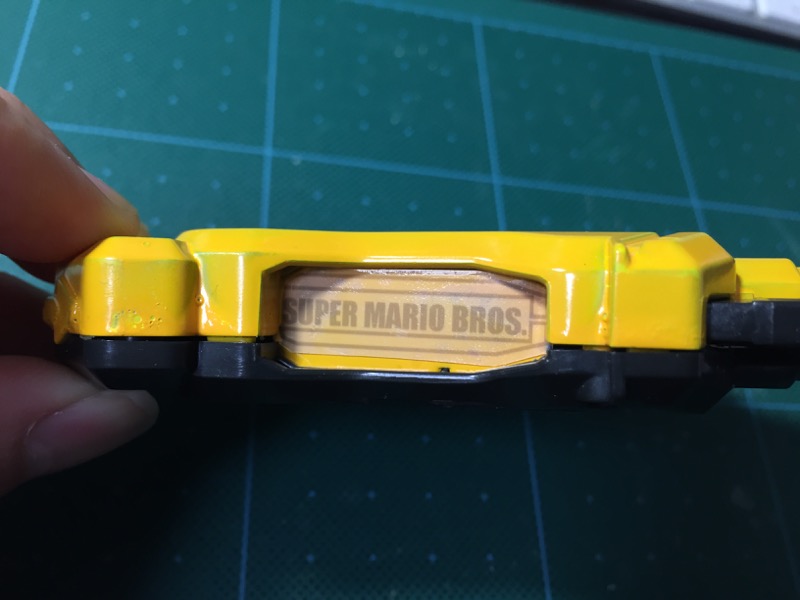
ラベル / Label

ラベルのイラストはパワーポイントで作成しています。ゲームのパッケージの画像データの上に、ワードアートで作成した文字を重ねています。画像データと文字の大きさは、実際のガシャットのラベルを参照しながら合わせていきます。サイズがあったら、ラベル用のプリンタ用紙にプリンタで印刷します。
The image data of this label was made by Microsoft PowerPoint. You should add the title text of your game using WordArt on the package image data of your game. You should adjust the sizes of image data and title text to the original gashat’s label. After adjusting the sizes, you should print the data on a printer sheet for label using your ink-jet printer.
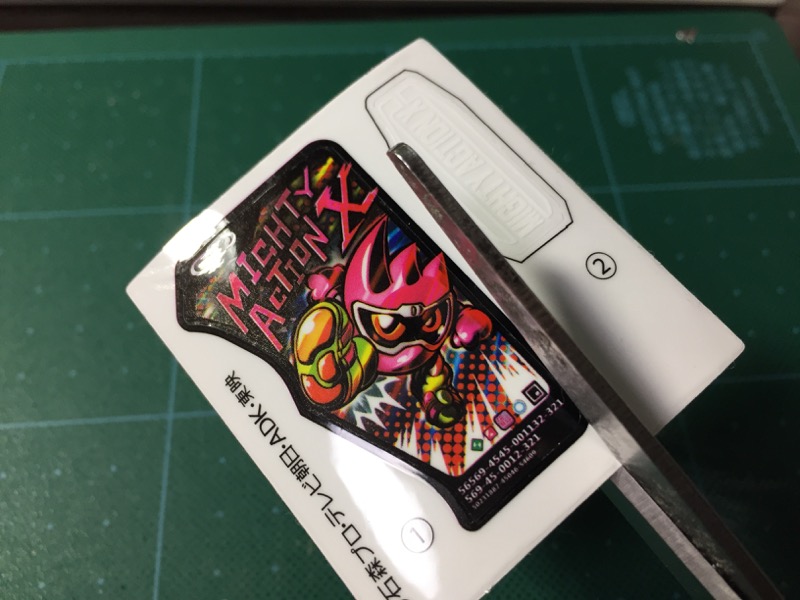
黒い縁取りについては、実際のラベルをこんな感じでハサミでカットして、先ほど作成したラベルの上に貼り付けています。
You should cut the black line surrounding a label of an original gashat with scissors , and put it on your label.
だから、拡大してみると、黒い縁取りに切れ目が入っていることがわかります。カッターで切り取った方が綺麗にできるかもしれませんが、難しそうだったので止めました。
So, in closeup, you can find a cut line in my gasaht. You may get a more beautiful line if you cut with a cutter knife, but it seems to be difficult, so I didn’t.
背面のラベルは、透明のラベル用の用紙に文字や図形を印刷して貼り付けていますが、もし塗装の技術を持っているなら、ここは本当は塗装で表現した方が綺麗だと思います。
I printed texts and figures on a clear printer sheet for label, and affixed it on the back of the gashat. But, I think, if you have an ability to paint, you should paint them directly. It makes your gashat more beautiful.
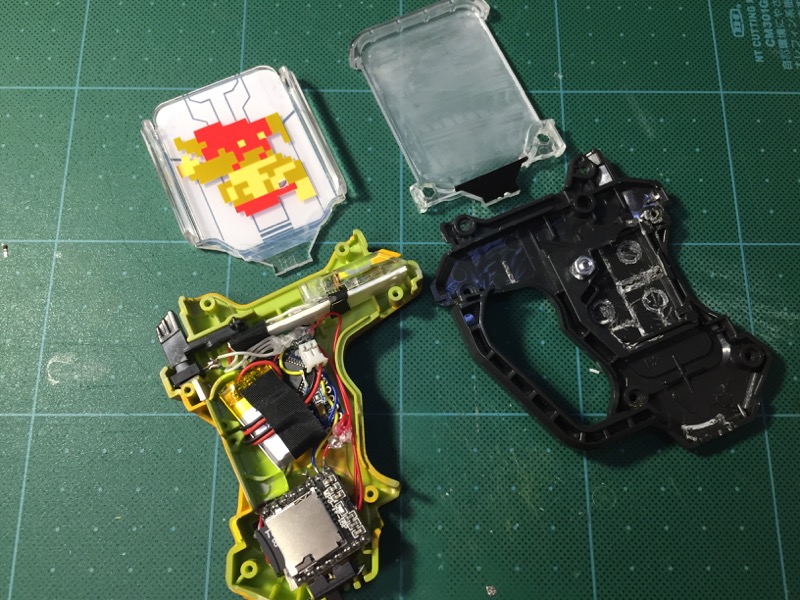
クリアーパーツ / Clear Parts
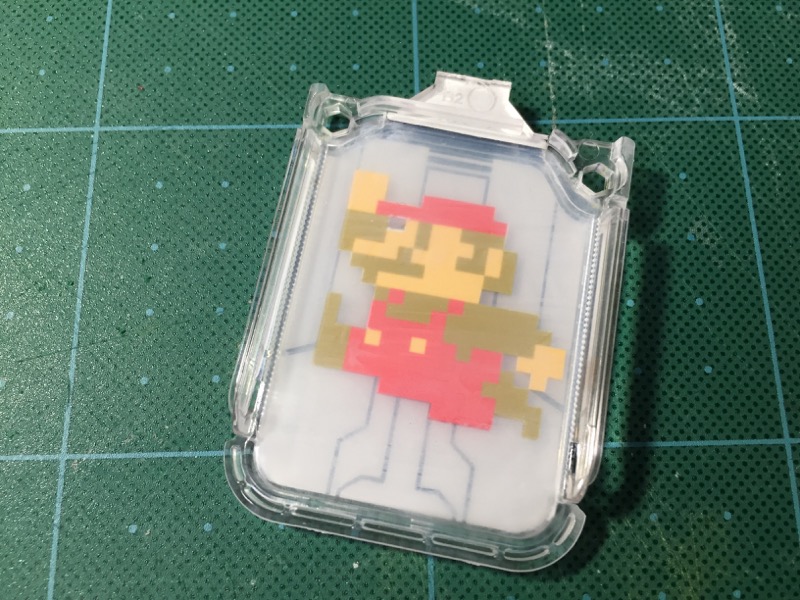
クリアーパーツは分解すると、以下のように2つに分かれます。
Clear parts are divided into following two parts.
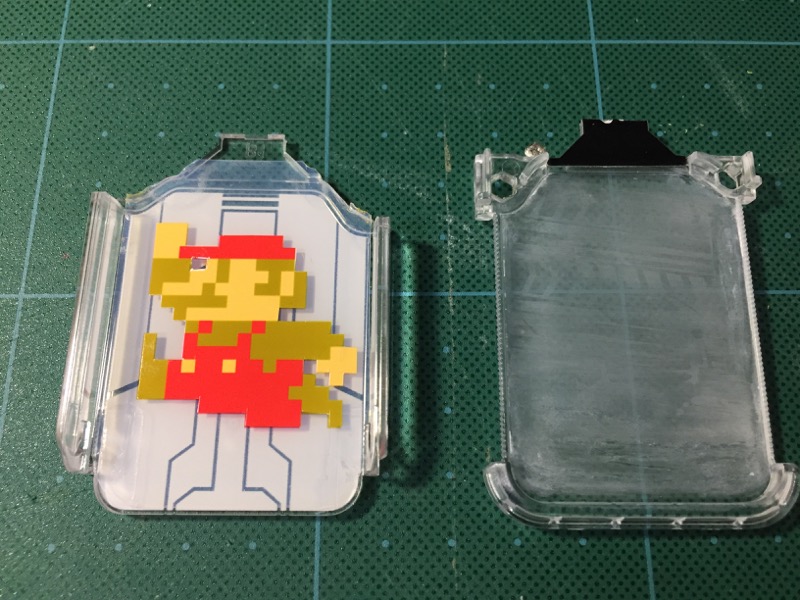
片方(写真左)には、先ほどと同様に、ラベル用プリンタ用紙に印刷したイラストを貼り付けます。
For one part (photo: left), you should affix a picture printed on a printer sheet for label in the same way as the labels.
もう片方(写真右)は、元々のガシャットのイラスト(自分の場合はシャカリキスポーツのイラスト)を消す必要があります。自分はマニキュアの除光液でイラストを消しましたが、オススメしません。ご覧のとおり、全体的に白っぽくなります。手間は掛かりますが、番号高めのサンドペーパーを水につけてイラストを剥がした方がよいと思います。
For the other (photo: right), you must clear an original picture of your gashat. In my case, that was “Shakariki Sports” picture. I cleared it using a nail-polish remover, but you shouldn’t use it. As you can see, it makes clear parts whitish. It takes a lot of time to remove a picture with water-ret fine abrasive paper, but it will clear the picture more beautifully.
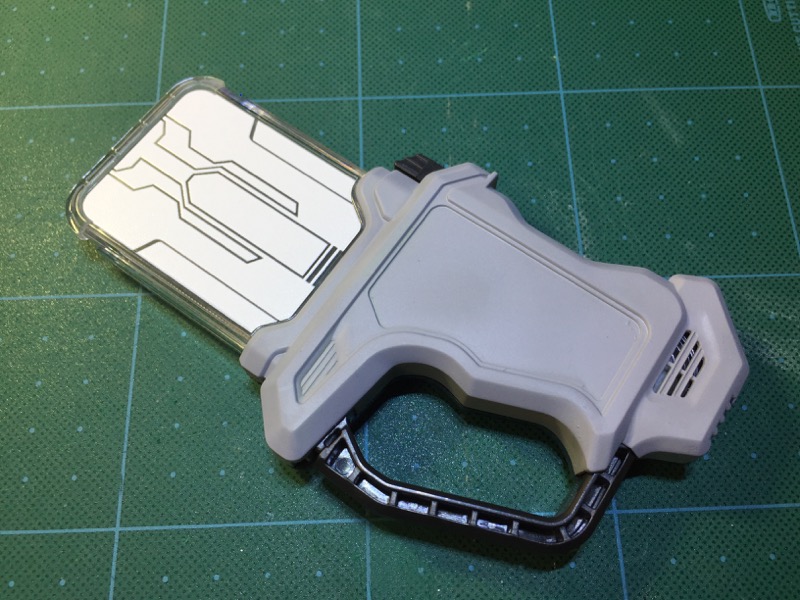
ケース加工 / Case Processing
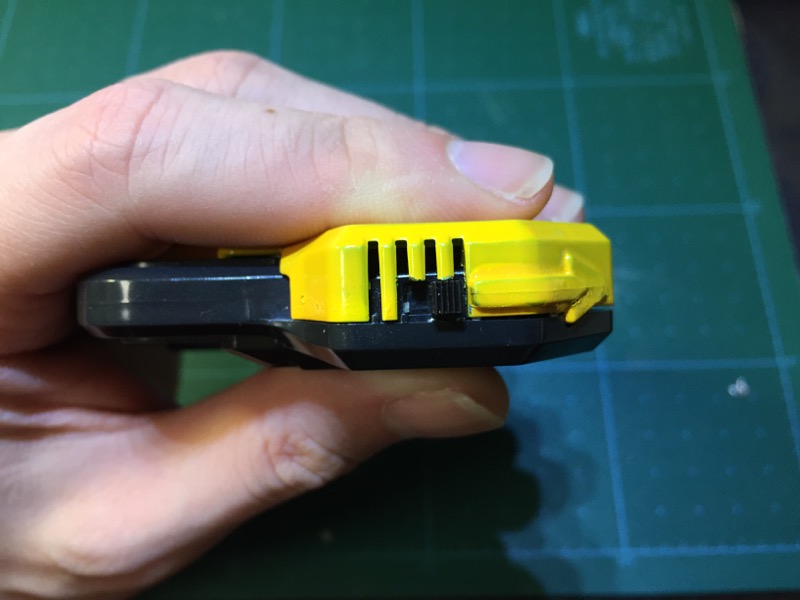
一見すると形は元のガシャットのままですが、一箇所だけ、スライドスイッチの追加のため、穴を開けています。スライドスイッチを入れておかないと、制御基板であるArduinoに常時電流が流れてしまうことになり、あっという間にバッテリー切れになってしまいます。
At first glance, there are no modification on the exterior of my gashat. In fact, there is a hole to add a slide switch. If you don’t add it, your gashat will run out of battery soon, because an Arduino which controls your gashat always consumes a lot of current.
…はい、ということで、とりあえず外装について英語で説明してみました。やっぱり大変時間がかかります。冬休み中じゃなかったら多分やっていませんでした。内側は後編で解説します。
I’ll explain about the inside of the Mario Gashat in next article, published January 14th, 2017.